Thursday, September 5, 2013

How to create a Facebook fan page

Facebook is the largest social media network in the world. It is the best place to promote your brands throughout your country or the world. Facebook has become a giant marketing tool for many brands. When introducing a product or a brand over social networking sites, it will go viral and increase your business. This is a latest strategy widely implemented by all big company to reach the products to the target customers or audience. Here the company is not going to spend even a penny to promote the products.

Big or small, anything can be promoted on Facebook. For example, you can promote a very expensive car as well as a small website. It may create a tremendous progress tendency with overnight.

If you want to promote a brand on Facebook, you need to create a fanpage. This tutorial covers only things that how to create a Facebook fan page for your business website or blog. Meantime I would like to mention one thing that there is no big difference in creating a fan page for other products too.

Step by step tutorial

After logging in, just head over to www.facebook.com/pages. Click ‘Create Page’ button.
First Facebook offers you six category options in order to build a close relationship with your audience or customers. I.e. it ensures the page will reach the target audience.


Here you need to select ‘Brand or Product’ option and then you are prompted to choose a category from the long drop down menu. Scroll the menu till the end and choose ‘Website’. Add your brand name for your website. This name will appear on the fan page. Therefore the name must be clear. Don’t use hyphen or any confusing character. [It doesn’t mean the name must not have these characters. You can use any characters to create a name.] The name may not be unique. This is like your name.  Sometimes someone might have used the name before. Just type “Gagnam Style” in Facebook Graph Search Box; you will see several pages have been created with the same name. The things only depend how you promote your brand. Tick the cheque box to agree to Facebook Pages Terms and click ‘Get Started’.


Now it is the time for setting up your page. Add a small description about your brand that will help to improve the ranking of your Page in search. For example your website carries the things regarding only mobile gadgets. You may describe like ‘This is a website for latest gadgets of iPhone, Samsung, Nokia and etc.”
Next add your website address. You may use temporary address as it’s not compulsory. You can then customize it. Click ‘Save info’ button.

Add a unique profile picture. Don’t use pictures downloaded from other websites. You may face copyright problem. Use your picture or create a unique picture using an image editing tool.

Now almost done. Invite your friends to like your page.


Thursday, August 29, 2013

Use your Windows PC as a Virtual Router

If you have a laptop or wireless network card installed desktop running on Windows 7, Windows 8 or Windows Server 2008 R2, you can use it as a virtual wireless router and make a WiFi hotspot.

Therefore you will be able to wirelessly share your internet connection with other WiFi devices such as laptop, smartphone, iPod Touch, iPhone, Android phone, zune, netbook, wireless printer and etc.

How to do it? A simple application, called Virtual Router Manager, helps you to turn Windows system as Virtual Router just like an access point. It is a free and open source software. It provides the most secured wireless encrypted - WPA2 connection.


This app neither have any ad-wares nor tracks your web traffic. After the installation, give a network name (SSID) and a password as you wish. Click the 'Shared connection' combo and choose the connection which you want to share with. Make sure your password must be at least 8 characters.

Click here to download the Virtual Router Manager.

That's all. Enjoy!

Wednesday, August 28, 2013

Record Skype video calls for free

Skype is a freemium voice-over-IP service and instant messaging client founded in 2003 by Janus Friis from Denmark and Niklas Zennstrom from Sweden. On 10 May 2011, Microsoft Corporation acquired Skype Communications.

With the introduction of Skype, there was a tremendous revolution in communication technology. Today it becomes an inevitable one for everyone in the world. People make free voice or video calls via Skype with their dearest ones who lives in the other part of the world.

Video call is the greatest feature provided by Skype for free. Everyone likes to record the video calls made through Skype. A father who is abroad might like to record his naughty children’s talk or actions. A business organization likes to record their video conferences. But there is no option to record any video or audio calls with the software.


Recently I found free software called Free Skype call recorder developed by DVDVideoSoft developers. It records the Skype video calls smoothly.

Click record button when video call starts. Keep in mind it won't automatically record your video calls. This application lets you to record the calls in three ways:


1.    Record all sides: This option records your friend’s video as well as your video.
2.    Record other side only: This option records your friend’s video only not yours.
3.    Record audio only

Click here to download this software and install in your PC.

Tuesday, August 27, 2013

Facebook emoticons and funny symbols

An emoticon is a pictorial representation of a facial expression frequently used in social networking sites to draw the receiver’s attention. These symbols are interesting, expressive and beautiful. An emoticon is powerful than a text.

It expresses a person's feelings or mood and can include usually punctuation marks numbers and letters, as well. In the most recent years, as the epidemic of social media and texting is at an all time high, emoticons have played a significant role in communication through technology. These emoticons offer another range of "tone" and feeling through texting that portrays specific emotions through facial gestures while in the midst of cyber communication.

Here I displayed some general emoticons widely used by FB users.


Funny Symbol and Characters
I was astonished how some friends create funny texts and character. Then I learnt that some web apps offer facility to create funny texts.

fsymbols.com
fsymbols.com is one of the best websites to make such funny text and emoticons. Just head to the website and click button ‘Carty’, ‘Tarty’, ‘Rusify’, ‘Encool’ or ‘Flip’. Now type your text in the left box. Simultaneously you text will be converted to the funny symbol. Copy the symbols and paste in your Facebook wall.


You can also create your own text art or ASCII art for Facebook using this web app.


Symbols-n-emoticons.com
This website provides you new Facebook chat emoticons. These are cool and larger than normal ones. You’ll be able to share precisely how you feel with your FB friends. Just select an emoticon and get the code to paste in Facebook.

Friday, August 23, 2013

How to get More Free Space in Dropbox

Get more free space on Dropbox
Dropbox is the one of the leading cloud storage where you can store your files and access them from anywhere. Click here to learn more about Dropbox.

As you know, Dropbox only provides 2 GB free space for each sign up but you can extend the space up to 1000 GB when you upgrade your account to business plan, a paid service.

However, you can get some more free space by involving promotion activities and techniques.

Here I listed the ways to increase the free space size up to 20.34 GB.

Earn by getting started
Dropbox offers you 250 MB free space when you complete the tasks under the ‘Get started’. The tasks are: take the Dropbox tour, install Dropbox on your computer, put files in your Dropbox folder, install Dropbox on other computers you use, share a folder with friends or colleagues, invite some friends to join Dropbox and finally install Dropbox on your mobile device.

Refer friends to Dropbox
Here you can earn a huge free space by inviting your friends to join Dropbox. Every time a friend joins and installs Dropbox on his/her computer, you will be given 500 MB of bonus space. You can invite your friends via emails. But this bonus is limited up to 16 GB i.e. 32 friends’ referrals can be made with your one account.

Connect to Twitter
Keep abreast of Dropbox by following it on Twitter and link you account with it. You will earn 250 MB. Tweet your feedback to earn another 125 MB free space.


Connect to Facebook
Earn another 125 MB by connecting your account with Facebook.

Keep using Camera Uploads
Set the pictures taken by your phone camera to upload into Dropbox and get another 500MB free space.

Say why you love Dropbox

Give a feedback in 90 characters saying the reason for why you love Dropbox.  Dropbox offers you 125MB free space.

Connect Mailbox for iOS to Dropbox
This is good news for iPhone users. Now you are able to get 1 GB space when you connect your Mailbox to Dropbox. This is the latest way to get free space. If you already connected with Mailbox, you need to reconnect them to get free space.


Means
Free space size
Sing up
2 GB
Getting Started
250 MB
Friends referrals
16 GB
Keeping camera Uploads
500 MB
Connect to Mailbox
1 GB
Connect to Facebook
125 MB
Connect to Twitter
125 MB
Follow on Twitter
125 MB
Sat why you love (Feedback)
125 MB
Tweet your feedback
125 MB
Total free space
20.34 GB

Wednesday, August 21, 2013

The best image resizer forever

We often upload images for various purposes. We share photos on Facebook, send them to our friends through email or publish them in websites. I noticed some people who upload their photos as soon as they captured from the camera. They do not resize their pictures. The problem is, size of a picture plays major role while uploading. Generally size of a high quality picture is obviously high and it will take a big deal of time and meter your internet data. Moreover, sharing a high quality picture on Facebook is also pointless. Therefore, I  recommend you to resize your photos before uploading them.

If you have a few pictures, you can resize them using Photoshop or Ms. Paint. But if your pictures are in large number, it is the best way to go for batch image-resizing software like Light Image Resizer, a free software for personal use.

Light Image Resizer, early it was called VSO Image Resizer, is a simple but powerful software for image resizing. You can simply resize your pictures one by one or via batch mode. Once you created a profile, then your image resizing process becomes much easier.

Light Image Resizer (LIR) resizes and converts your pictures without losing its quality with the selected size. It supports wide range of picture formats. It is available as a windows shell extension. Therefore, just right click to easily resize pictures as copies or continue to work on the original HQ photos. Then share your resized photos online with friends.

How to resize:

Load or drag your photos to the application and click ‘Next’. Choose a profile form the dropdown menu. In my case, I chose 800 X 600 px, which is the best resolution for uploading pictures to Facebook. That’s enough. Click ‘Process’ button to start the process. Within a few seconds, you pictures will be resized. Generally LIR creates copies and keeps your originals in the same folder. You can stop creating copies by choosing ‘Resize Original’ from the Action dropdown menu. It also allows to change to the destination folder.


How to watermark a picture:

Another cool feature provided by LIR is that you can create your own watermarks to put on the pictures for the copyright purpose. It is a much easy job. After setting up your profile, click ‘Effect’ tab and check the ‘Integrate watermark’. Then click ‘Watermark’ button. There are two choices for putting watermark. If you have already created a watermark image, you can print it on every picture. In next method, enter some text to appear on the pictures. Click ‘Text’ tab and add your text. Set font color, size and opacity and press ‘Preview’ button to see the effect. If you are satisfied click ‘OK’ button.


How to add border:

Check ‘Add Border’ in the Effect tab.


Click here to download the software from author's site

Monday, August 19, 2013

Print a document directly from Android Phone

Have you ever heard about ‘Cloud Print’ and how does it work? Cloud Print is an amazing feature facilitated by Google. If you have an Android phone or tablet, you can print your documents from the device directly without sending them to your PC.

Cloud Print works with web based technology. Each time you print, your file is sent to your printer over the web. Therefore you don't need to stay near the printer. You can print a document from another country too.

Everybody now, is very hectic and feels boring to connect and send the documents between PC and phone. With this new technology, you can print your document from wherever you are. For example you can print your document from your mobile phone having a cup of tea at your office canteen.

What are basic requirements for cloud printing? Don’t worry everything you have. You need a PC with a printer, A phone running with Android OS, internet connection for both PC and phone and Gmail ID.

Here are the steps

Step1:

If you use Google Chrome first time in your PC, you are prompted to connect your browser with your Google account. If you are already connected, please skip this step. There are many advantages when you connected to Chrome. But this post doesn’t cover those advantages.

Give your username and password to connect and click Sign in.

Step2:

Go to Settings and click Show advanced settings… Scroll the browser till the end. You can find Google Cloud Print option. Click Add Print button. Google Cloud Print automatically detects the printers that have been connected with your PC. It also detects your virtual printers. You can add all printers to Cloud Printing service. After selecting the printers click Add Printer(s) button.


Step3:

Now this is the time for installing Cloud Print app to your phone. Cloud Print is a free app powered by Google. You can download it from Google Play Store.

Step4:

After installation, you are prompted to add to your Google account with the app. Use the same account and connect.

That’s all. Now open a picture or document with the Cloud Print app and tap ‘Click here to Print’ button.


Wednesday, August 14, 2013

Convert a Youtube Video to MP3 format with Online Converters

Youtube videos can be converted into MP3 format. Sometimes our favorite songs are available on Youtube but they are not in MP3 at any other places or sources. This time you can convert the Youtube songs to MP3 format.

Several desktop apps are available on internet but this tutorial looks only how to use online converters to do this task. All that you have to do is, copy and paste the URL of the video in the box provided. The web app converts the video into MP3 and gives you download link.

Here I am going to list out 5 web apps for Youtube to MP3 conversion. Keep mind downloading and converting Youtube videos are against to Youtube policy.

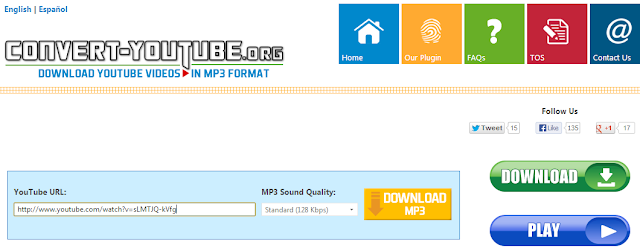
1. convert-youtube.org

This is my favourite web app which provides fastest and easiest way to convert to our favourite videos to MP3. The main reason is, it allows to set different sound quality such as Low, Standard, High and CD quality. The app gives you an optional plugin for easy conversion to MP3 format while browsing YouTube.


2. tomp3youtube.com

This app gives two options for the conversion. While playing a Youtube video, simply add ‘tomp3’ before ‘youtube.com’ URL.   For example:
Before http://www.youtube.com/watch?v=9bZkp7q19f0
After http://www.tomp3youtube.com/watch?v=9bZkp7q19f0
The next option is usual way – place URL and click ‘Convert to MP3’ button.


3. youtube-mp3.org

This is very simple app. Place the URL and start the downloading within a minute. All video will be performed in high quality mode with a bit rate of 128 kBit/s.

4. flvto.com

It is a cool app. You can see the conversion graphically.

5. video2mp3.net

The web app also offers the fastest mp3 converter ever!

Tuesday, August 13, 2013

Quickest way to take notes in Chrome

Quick Note is a Chrome extension that helps to take notes from various sources as quick as the other desktop applications. You can use it for many purposes rather than a note taking software such as scratchpad, clipboard or to make to do list.

How to use it?
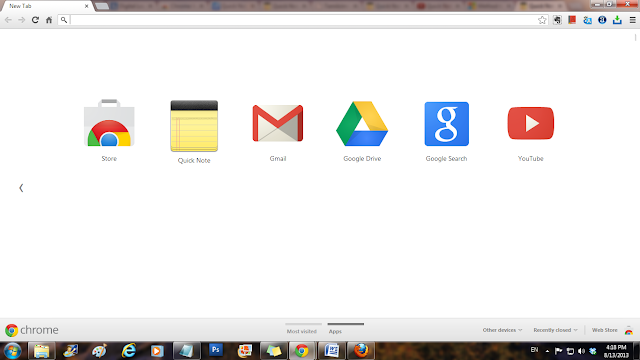
1.    Once you added this to Chrome, it displays at start up apps list.

2.     Click Quick Note and type whatever you want.  Click [+] button to add new note. This time your previous note is saved into browser as well as cloud. Each note is saved with a title and date & time which help you to search saved notes later as the app comes with quick search facility.

3.    Click Trash button at the top right of each note to delete a note.
4.    If you find any interesting text and want to make it a note, simply select the text, right click it and choose ‘Add to selection to note’. Your text is instantly copied to Quick Note.


Synchronization with Cloud

Quick Note generally runs offline. But it uses Diigo.com to provide cloud-based storage. You can use your Google id to sign up an account in Diigo.com. Once you signed up with Diigo.com, all your notes sync with cloud therefore you can access your note from anywhere and also you can access your notes with Android device or iPad.

Future Plan

Quick Note has planned to integrate the app with other popular cloud-based services such as Dropbox, box.net, Google docs, Evernote.

Click this link to add this extension to your Chrome browser.